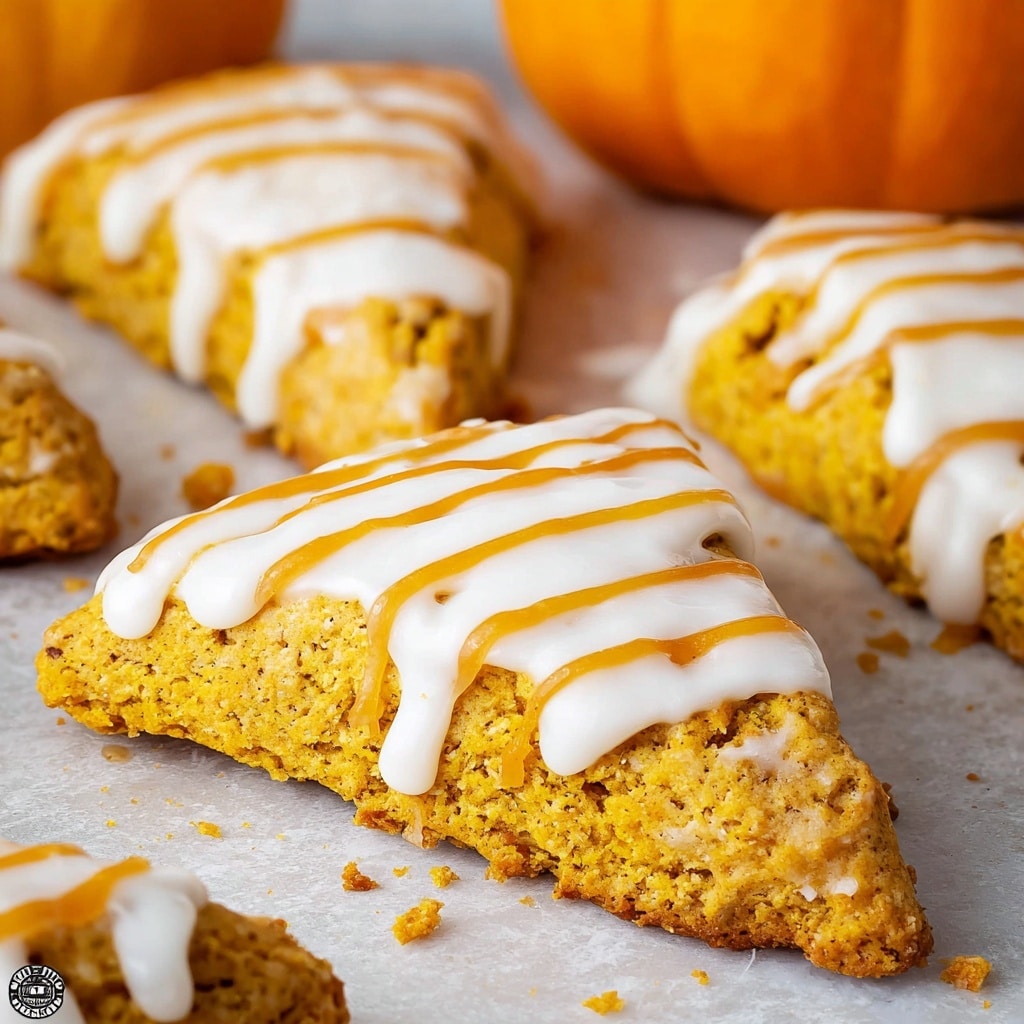
Starbucks Pumpkin Scones Recipe
If you have a soft spot for cozy autumn flavors, then you are going to absolutely adore these Starbucks Pumpkin Scones. This recipe perfectly captures that delightful blend of warm spices and rich pumpkin that feels like a hug in pastry form. Starbucks Pumpkin Scones are soft, tender, and slightly crumbly with just the right hint of sweetness and spice, making them an ideal treat for breakfast, snack time, or even a classy brunch. Once you make these, you might never want to buy them again because this homemade version is packed with fresh ingredients and love, delivering that nostalgic seasonal bliss straight to your kitchen.
Ingredients You’ll Need
Making Starbucks Pumpkin Scones is surprisingly simple thanks to a handful of straightforward ingredients that each play an important role in creating the perfect texture, flavor, and color. Each component from the spices to the pumpkin puree helps build that familiar cozy taste we all crave.
- All-purpose flour: The foundation for tender, flaky scones with the perfect crumb.
- Baking powder: Gives the scones a light rise and delicate lift.
- Baking soda: Works alongside baking powder to ensure a soft texture.
- Salt: Balances the sweetness and enhances the spices.
- Ground cinnamon: Infuses cozy warmth and classic fall aroma.
- Ground nutmeg: Adds a fragrant, slightly sweet spiciness.
- Ground ginger: Brings a subtle zing that complements pumpkin.
- Unsalted butter: Cold and cubed, it creates flaky layers when cut into the dough.
- Pumpkin puree: The star ingredient that adds moisture, vibrant color, and that unmistakable pumpkin flavor.
- Light brown sugar: Offers a mellow caramel sweetness and keeps the scones moist.
- Large egg: Binds everything together and adds richness.
- Heavy cream: Invigorates moisture in the dough and contributes to a golden crust.
- Powdered sugar: For the luscious, sweet glaze topping.
How to Make Starbucks Pumpkin Scones
Step 1: Combine the Dry Ingredients
Start by whisking together your all-purpose flour, baking powder, baking soda, salt, cinnamon, nutmeg, and ground ginger in a large mixing bowl. This blend of spices will instantly fill your kitchen with that inviting pumpkin-spiced scent, setting the perfect scene for your scones.
Step 2: Cut in the Cold Butter
Add the cold, cubed butter into the dry ingredients and use a pastry cutter or two knives to work the butter into the flour mixture. You’re looking for pea-sized bits of butter throughout, which will create those flaky pockets once baked. This is what makes every bite satisfyingly tender.
Step 3: Whisk Wet Ingredients
In a separate bowl, beat together the pumpkin puree, light brown sugar, egg, and heavy cream. The pumpkin not only lends moisture but also the beautiful orange hue that screams autumn. Whisk until everything is perfectly combined for a smooth, rich mixture.
Step 4: Bring the Dough Together
Pour the wet pumpkin mixture into the dry ingredients and stir gently until just combined. The dough will feel a bit sticky and wet, which is exactly how it should be to keep the scones tender instead of tough.
Step 5: Shape and Slice the Dough
Turn the sticky dough out onto a generously floured surface, and dust the top with a bit of flour too. Use floured hands to pat it into an 8-inch circle. Then, using a sharp knife, carefully cut the disc into 8 equal wedges. These are your scones waiting to be baked.
Step 6: Chill and Bake
Set the pumpkin scones on a parchment-lined baking sheet and pop them in the fridge while you preheat your oven to 400°F (200°C) — or 180°C if you use a fan oven. Chilling helps the butter firm up again, creating flakiness in the oven. Before baking, brush the tops with a little heavy cream to get a golden glow. Bake for 12-15 minutes until a toothpick comes out clean and the bottoms are just lightly golden.
Step 7: Prepare the Simple Glaze
While your scones are baking, mix 2 cups of powdered sugar with heavy cream until you get a silky, spreadable glaze. This sweet layer will soak into the scones for extra indulgence once they’re cool enough.
Step 8: Cool and Glaze
Let the scones cool completely before spreading the vanilla glaze generously over each one. This prevents it from sliding off and ensures the perfect texture of glaze on top.
Step 9: Make the Pumpkin-Spiced Drizzle
To the remaining glaze, whisk in 1 tablespoon of pumpkin puree and ¼ teaspoon cinnamon, adjusting with powdered sugar if needed to keep it thick enough to drizzle. This extra pumpkin glaze ups the flavor game and gives your scones that iconic Starbucks Pumpkin Scones look and taste.
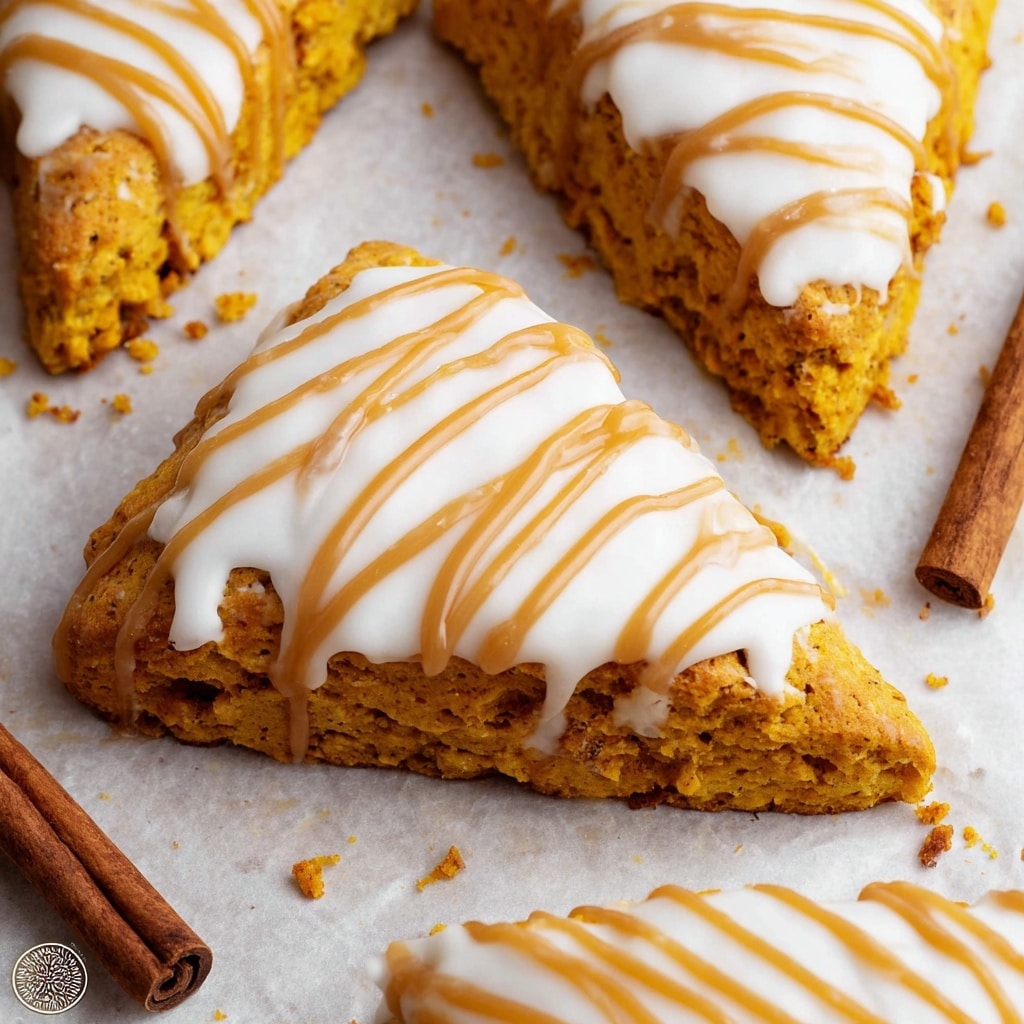
Step 10: Drizzle and Decorate
After the first glaze has set for about 10 minutes, drizzle or pipe the pumpkin-spiced glaze over your scones. This final touch brings the whole treat together with gorgeous autumn vibes and unbeatable flavor.
How to Serve Starbucks Pumpkin Scones
Garnishes
You can keep your Starbucks Pumpkin Scones classic or dress them up with a few garnishes. A light dusting of cinnamon or a sprinkle of finely chopped pecans adds texture and a festive touch that makes every bite even more exciting.
Side Dishes
Pairing these scones with a hot cup of coffee or chai tea completes the experience perfectly. For a more substantial treat, serving alongside creamy mascarpone or whipped butter with honey can elevate your pumpkin scone moment to an indulgent, café-style delight.
Creative Ways to Present
If you’re taking these scones to a brunch or fall gathering, arrange them in a rustic basket lined with a cozy napkin. Drizzling extra pumpkin glaze over each scone right before serving adds a show-stopping look. You can even add edible flowers or a sprig of fresh rosemary for an extra splash of color and aroma.
Make Ahead and Storage
Storing Leftovers
Keep leftover Starbucks Pumpkin Scones in an airtight container at room temperature for up to 2 days to maintain their freshness. Avoid refrigeration as it can dry them out quickly, but if your kitchen is very warm, a brief fridge stay wrapped tightly can work.
Freezing
For longer storage, freeze baked scones in a single layer on a baking sheet, then transfer them to a freezer-safe bag or container. They’ll keep well for up to 3 months. Thaw overnight in the fridge or at room temperature before enjoying.
Reheating
To revive your scones’ warm, freshly baked charm, pop them in a preheated oven at 350°F (175°C) for 5-7 minutes or warm gently in the microwave for 20-30 seconds. This makes them cozy again without drying out that tender crumb.
FAQs
Can I substitute pumpkin puree with something else?
While pumpkin puree is key to authentic Starbucks Pumpkin Scones flavor and texture, you could experiment with sweet potato or butternut squash puree for similar moistness and mild sweetness. Just note the taste will vary slightly.
What if I don’t have all the spices on hand?
Cinnamon is the most essential, but if you’re missing nutmeg or ginger, using additional cinnamon and a pinch of cloves or allspice can work. The overall warmth comes from layering these spices, so try to keep at least two for balance.
How can I make these scones dairy-free?
Swap the butter for a solid coconut oil or vegan butter, and use a plant-based cream alternative like oat or almond cream. These swaps will slightly change texture but keep the scones moist and delicious.
Are Starbucks Pumpkin Scones supposed to be crumbly or cakey?
True Starbucks Pumpkin Scones have a tender, slightly crumbly texture with a bit of cakey softness. They should be moist but hold together; too dry usually means overbaked or too much flour.
Can I double this recipe?
Absolutely! Just be sure to mix in batches if your bowl is small, and watch baking times closely as a crowded oven can affect how evenly they bake.
Final Thoughts
Making Starbucks Pumpkin Scones at home is such a joyful experience. From the first mixing of warm spices and pumpkin to the moment you drizzle that glossy glaze, every step feels like preparing a little celebration of fall. Trust me, once you bake these, you’ll want to whip up a fresh batch every season. So grab those ingredients, clear your counter, and dive into this comforting, delicious ritual that’s bound to brighten your day and warm every gathering.
PrintStarbucks Pumpkin Scones Recipe

These Starbucks-style Pumpkin Scones are tender, buttery, and packed with warm spices and pumpkin flavor. Topped with a sweet cream glaze and a spiced pumpkin drizzle, they make a perfect cozy fall treat to enjoy with your coffee or tea.
- Prep Time: 20 minutes
- Cook Time: 15 minutes
- Total Time: 35 minutes
- Yield: 8 scones 1x
- Category: Baked Goods, Breakfast, Snack
- Method: Baking
- Cuisine: American
- Diet: Vegetarian
Ingredients
Dry Ingredients
- 2 ½ cups all purpose flour
- 1 tablespoon baking powder
- ½ teaspoon baking soda
- ½ teaspoon salt
- 1 teaspoon ground cinnamon
- ¼ teaspoon ground nutmeg
- ¼ teaspoon ground ginger
Wet Ingredients
- ½ cup unsalted butter (very cold and cubed into small pieces)
- ¾ cup pumpkin puree
- ½ cup light brown sugar
- 1 large egg
- ¼ cup heavy cream (plus more for brushing on the tops)
Glaze
- 2 – 2 ½ cups powdered sugar
- 4–5 tablespoons heavy cream
- 1 tablespoon pumpkin puree
- ¼ teaspoon ground cinnamon
Instructions
- Mix Dry Ingredients: In a large mixing bowl, whisk together the flour, baking powder, baking soda, salt, cinnamon, nutmeg, and ground ginger until evenly combined.
- Cut in Butter: Add the cold cubed butter to the flour mixture. Use a pastry cutter or two butter knives to cut the butter in until the largest pieces are pea-sized; this helps create a flaky texture.
- Combine Wet Ingredients: In a smaller bowl, whisk together the pumpkin puree, brown sugar, egg, and ¼ cup heavy cream until fully blended and smooth.
- Form Dough: Pour the wet ingredients into the dry mixture and stir gently until just combined. The dough will be very sticky and moist.
- Shape Scones: Transfer the dough onto a well-floured surface and sprinkle flour over the top. Form the dough into an 8-inch (20 cm) disc using floured hands. Cut into 8 equal wedges. Carefully transfer the wedges to a parchment-lined baking sheet.
- Chill and Preheat: Preheat your oven to 400°F (200°C) or 180°C if using a fan oven. Place the scones in the fridge while the oven heats. Remove from the fridge and brush the tops with a little heavy cream for a golden finish.
- Bake: Bake scones for 12-15 minutes until a toothpick inserted comes out clean and bottoms are lightly golden brown.
- Prepare Glaze: While baking, whisk 2 cups of powdered sugar with enough heavy cream (about 4 tablespoons) until smooth and spreadable.
- Glaze Scones: Allow scones to cool completely. Spoon or spread the white glaze evenly over each scone.
- Prepare Pumpkin Drizzle: To the remaining glaze, add pumpkin puree and cinnamon and whisk until smooth. Adjust thickness with more powdered sugar as needed.
- Finish: Drizzle or pipe the pumpkin glaze over the scones once the first white glaze layer has set slightly (about 10 minutes).
Notes
- Use very cold butter to achieve flaky, tender scones.
- Ensure the dough is not overmixed to keep scones light and crumbly.
- Allow scones to cool fully before glazing to prevent melting or sliding of icing.
- Adjust glaze consistency with powdered sugar or cream to your desired thickness.
- Store leftover scones in an airtight container at room temperature for up to 2 days or freeze for longer storage.
Nutrition
- Serving Size: 1 scone
- Calories: 320 kcal
- Sugar: 20 g
- Sodium: 250 mg
- Fat: 15 g
- Saturated Fat: 9 g
- Unsaturated Fat: 5 g
- Trans Fat: 0 g
- Carbohydrates: 40 g
- Fiber: 2 g
- Protein: 4 g
- Cholesterol: 60 mg
Keywords: pumpkin scones, starbucks pumpkin scones, fall recipes, pumpkin spice, baked goods, scone recipe, pumpkin dessert, autumn treats