Baked Mac and Cheese Recipe (Cheesy & Creamy) Recipe
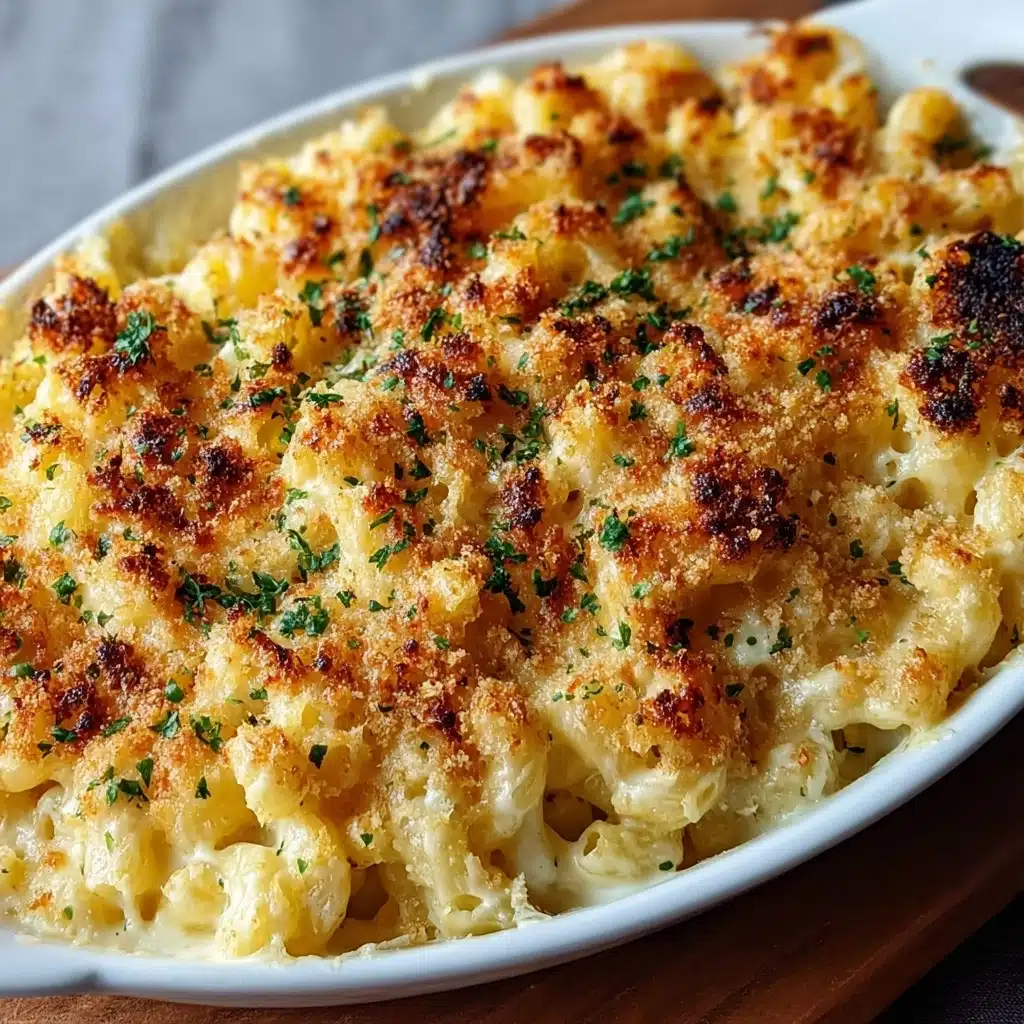
If you’re craving the ultimate comfort food, look no further than this Baked Mac and Cheese Recipe (Cheesy & Creamy) that delivers a perfect harmony of rich, melty cheeses and a satisfyingly crunchy topping. This classic casserole blends sharp cheddar, mozzarella, and Parmesan into a smooth, luscious sauce enveloping tender elbow macaroni, then bakes to golden perfection with a crispy panko crust. It’s creamy, cheesy, and utterly irresistible—exactly what you need for a cozy night in or a crowd-pleasing family dinner.
Ingredients You’ll Need
This Baked Mac and Cheese Recipe (Cheesy & Creamy) comes together with simple, everyday ingredients, but each one plays a crucial role in creating that perfect balance of flavor, texture, and visual appeal. From the buttery roux that thickens the sauce to the trio of cheeses that gives the dish its signature rich taste, every ingredient counts.
- 12 oz elbow macaroni: The classic pasta choice that holds the creamy cheese sauce beautifully in every bite.
- 3 cups shredded sharp cheddar cheese: Provides a bold, tangy flavor that’s the backbone of the dish.
- 1 cup shredded mozzarella cheese: Adds smooth, stretchy texture for that iconic cheesiness.
- 1/2 cup grated Parmesan cheese: Brings a nutty, savory depth to enrich the sauce.
- 1/4 cup unsalted butter: The base for the roux, which creates a silky cheese sauce.
- 1/4 cup all-purpose flour: Helps thicken the sauce to the perfect creamy consistency.
- 3 cups whole milk: Makes the sauce rich and velvety, balancing the cheese flavors.
- 1/2 teaspoon salt: Enhances the natural flavors without overpowering the dish.
- 1/2 teaspoon black pepper: Adds a subtle, peppery warmth.
- 1/2 teaspoon paprika: Provides a mild smoky note and beautiful color to the sauce.
- 1 cup panko breadcrumbs: Creates a delightfully crunchy, golden topping for contrast.
How to Make Baked Mac and Cheese Recipe (Cheesy & Creamy)
Step 1: Preheat and Prepare
Start by heating your oven to 350°F (175°C) and greasing a 9×13-inch baking dish. This step ensures your mac and cheese won’t stick and will bake evenly to that gorgeous golden crust.
Step 2: Cook the Pasta
Boil the elbow macaroni according to the package instructions until just al dente. This slight bite prevents it from becoming mushy during baking, allowing the creamy sauce to cling perfectly to every piece.
Step 3: Make the Roux Base
In a large saucepan, melt your butter over medium heat, then whisk in flour. Cook this mixture for 1-2 minutes until it turns a light golden color, which cooks out the raw flour taste and sets the stage for a silky sauce.
Step 4: Create the Cheese Sauce
Slowly whisk in the milk, stirring constantly to avoid lumps. Continue until the sauce thickens, about 5 minutes. Then stir in salt, pepper, and paprika to build layers of flavor.
Step 5: Add the Cheese
Remove the sauce from heat and mix in 2 cups of sharp cheddar, mozzarella, and Parmesan cheeses until everything melts into a smooth, creamy sauce. This blend of cheeses gives the dish its beloved cheesy and creamy character.
Step 6: Combine and Assemble
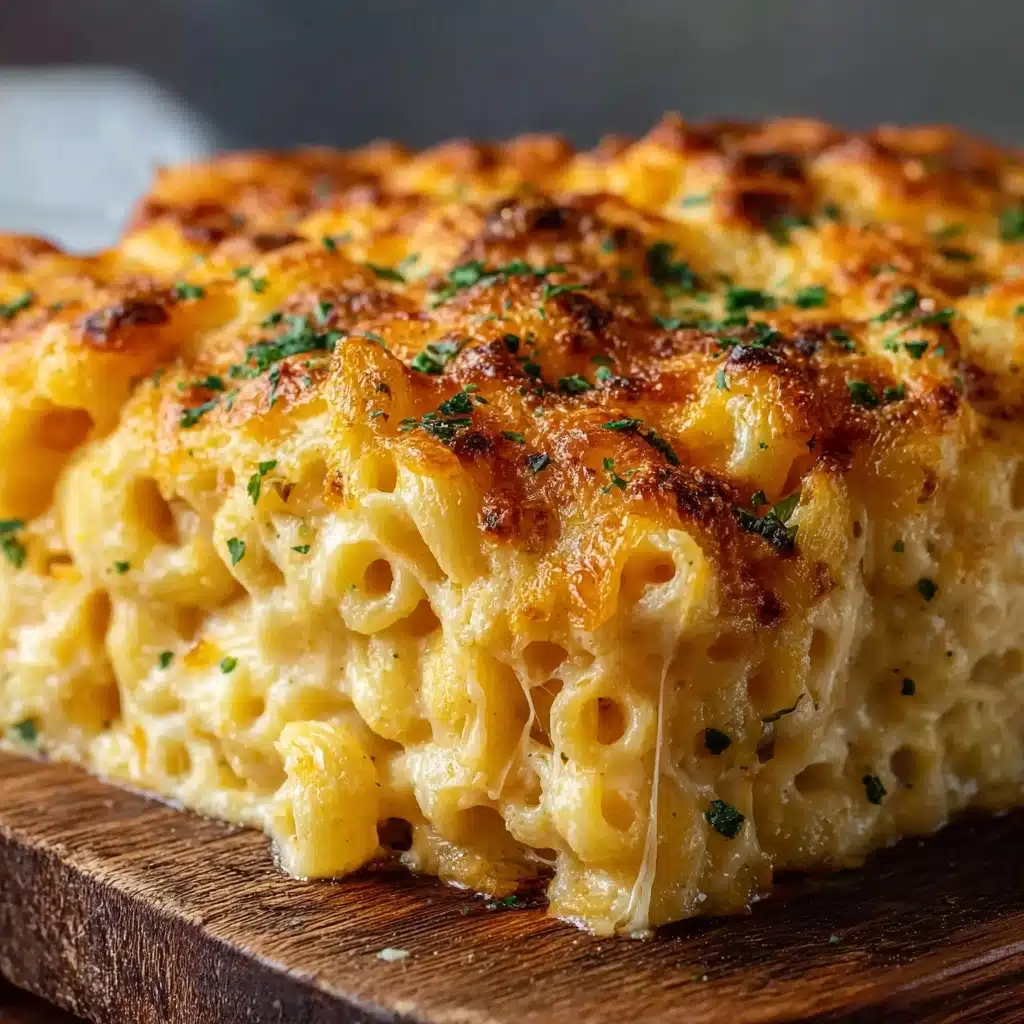
Mix the cooked pasta into the cheese sauce until every noodle is beautifully coated. Pour this mixture into the prepared baking dish, then sprinkle the remaining cheddar cheese and panko breadcrumbs evenly over the top for a crispy finish.
Step 7: Bake to Perfection
Bake for 25-30 minutes until the topping turns golden and bubbly. Let the dish cool for a few minutes before serving to let the sauce set just right, so each cheesy forkful is pure bliss.
How to Serve Baked Mac and Cheese Recipe (Cheesy & Creamy)
Garnishes
Enhance your Baked Mac and Cheese Recipe (Cheesy & Creamy) with simple garnishes like freshly chopped parsley or chives for a pop of color and a fresh herbal note. A sprinkle of extra Parmesan just before serving can also add a delightful finish.
Side Dishes
This dish pairs wonderfully with a crisp green salad dressed in an acidic vinaigrette to cut through the richness, or steamed veggies like broccoli or green beans to add freshness and texture contrast. For a heartier meal, grilled chicken or roasted sausages are fantastic companions.
Creative Ways to Present
For a fun twist, try serving the Baked Mac and Cheese Recipe (Cheesy & Creamy) in individual ramekins for personal portions perfect for dinner parties. You could also top with crumbled bacon or caramelized onions to introduce savory complexity and elevate presentation.
Make Ahead and Storage
Storing Leftovers
Cool leftover mac and cheese to room temperature, then store in an airtight container in the refrigerator for up to 3-4 days. This makes for a brilliant next-day comfort meal with minimal effort.
Freezing
You can freeze this Baked Mac and Cheese Recipe (Cheesy & Creamy) for up to 2 months. Use a freezer-safe container and make sure it’s well-covered. Thaw overnight in the fridge before reheating for best results.
Reheating
Reheat leftovers in the oven at 350°F (175°C) until warmed through and bubbly to revive that lovely crust. Alternatively, microwave in shorter intervals, stirring occasionally, although the crunchy topping will soften this way.
FAQs
Can I use different types of pasta for this recipe?
Absolutely! While elbow macaroni is classic, other small pasta shapes like shells, cavatappi, or penne work wonderfully as they hold onto the cheese sauce just as well.
How do I make this recipe gluten-free?
Substitute the all-purpose flour with a gluten-free blend or cornstarch for the roux, and use gluten-free pasta and breadcrumbs to keep it safe and delicious.
Can I add extras like bacon or vegetables?
Definitely! Cooked bacon bits, sautéed mushrooms, or steamed broccoli mix in beautifully and add extra flavor and nutrition to this rich dish.
What type of cheese works best in this baked mac and cheese?
A sharp cheddar is essential for flavor punch, while mozzarella adds creaminess and Parmesan offers a savory finish. Combining them creates a well-rounded, cheesy taste.
How do I get a crispy topping without breadcrumbs?
Try using crushed potato chips, fried onions, or even crushed crackers as alternatives to breadcrumbs for a crunchy, flavorful topping.
Final Thoughts
I can’t recommend trying this Baked Mac and Cheese Recipe (Cheesy & Creamy) enough—it’s the kind of dish that feels like a warm hug on a chilly evening and always leaves everyone asking for seconds. Whether you’re making it for a family dinner, potluck, or simply indulging your cheese cravings, it’s sure to become a beloved recipe in your kitchen. So grab your cheese grater and dive into this blissful, cheesy comfort classic!
PrintBaked Mac and Cheese Recipe (Cheesy & Creamy) Recipe

This Baked Mac and Cheese recipe delivers a rich, creamy, and cheesy comfort food classic, featuring a blend of sharp cheddar, mozzarella, and Parmesan cheeses baked to golden perfection with a crunchy panko breadcrumb topping.
- Prep Time: 15 minutes
- Cook Time: 35 minutes
- Total Time: 50 minutes
- Yield: 6 servings 1x
- Category: Main Course
- Method: Baking
- Cuisine: American
- Diet: Vegetarian
Ingredients
Pasta
- 12 oz elbow macaroni
Cheese Sauce
- 3 cups shredded sharp cheddar cheese, divided
- 1 cup shredded mozzarella cheese
- 1/2 cup grated Parmesan cheese
- 1/4 cup unsalted butter
- 1/4 cup all-purpose flour
- 3 cups whole milk
- 1/2 teaspoon salt
- 1/2 teaspoon black pepper
- 1/2 teaspoon paprika
Topping
- 1 cup panko breadcrumbs
Instructions
- Preheat and prepare baking dish: Preheat your oven to 350°F (175°C) and grease a 9×13-inch baking dish to prevent sticking.
- Cook macaroni: Boil the elbow macaroni according to package directions until just al dente, then drain and set aside to cool slightly.
- Make roux: In a large saucepan over medium heat, melt the unsalted butter. Whisk in the flour and cook for 1-2 minutes, stirring constantly until the mixture turns a light golden color, to form a roux.
- Add milk and season: Gradually pour in the whole milk while whisking continuously to avoid lumps. Continue stirring until the sauce thickens, about 5 minutes. Season with salt, black pepper, and paprika for flavor.
- Add cheese to sauce: Remove the saucepan from heat and stir in 2 cups of shredded sharp cheddar cheese, the shredded mozzarella, and grated Parmesan until the cheese melts completely and the sauce is smooth and creamy.
- Combine pasta and cheese sauce: Mix the cooked elbow macaroni into the cheese sauce ensuring all noodles are well coated. Pour this mixture evenly into the prepared baking dish.
- Add topping and bake: Sprinkle the remaining 1 cup of sharp cheddar cheese evenly over the macaroni, then top with 1 cup of panko breadcrumbs for a crispy crust. Bake in the oven for 25-30 minutes until the top is golden brown and bubbly.
- Cool and serve: Allow the baked mac and cheese to cool slightly before serving so it sets nicely, making it easier to portion and enjoy.
Notes
- For a crispier topping, you can mix the panko breadcrumbs with a tablespoon of melted butter before sprinkling on top.
- To make this dish ahead, assemble and refrigerate it for up to 24 hours before baking; add a few extra minutes to the baking time if baked cold.
- Substitute whole milk with 2% milk for a slightly lighter version without sacrificing too much creaminess.
- Feel free to add cooked bacon bits or sautéed onions for extra flavor and texture.
- Use gluten-free pasta and gluten-free flour if you need a gluten-free option.
Nutrition
- Serving Size: 1 cup
- Calories: 480 kcal
- Sugar: 7 g
- Sodium: 550 mg
- Fat: 25 g
- Saturated Fat: 14 g
- Unsaturated Fat: 9 g
- Trans Fat: 0.5 g
- Carbohydrates: 46 g
- Fiber: 2 g
- Protein: 20 g
- Cholesterol: 70 mg
Keywords: baked mac and cheese, creamy mac and cheese, cheesy pasta bake, comfort food, baked macaroni and cheese